Craving that thick, juicy guitar tone that cuts through the mix like a hot knife through butter? Tired of your sound being thin and lifeless? You've come to the right place! This article dives deep into three killer stereo guitar rig setups, guaranteed to inject massive sonic power and captivating depth into your playing. We’ll explore professional-grade techniques and equipment choices that will transform your sound from bland to breathtaking. Forget struggling with muddy mixes and weak stereo imaging – prepare for a sonic revelation.
We'll unravel the secrets behind each rig, providing detailed explanations and insightful pro tips to help you achieve stunning results. Ready to unlock your guitar's full potential and create truly immersive soundscapes? Follow our step-by-step guide to build these powerful stereo rigs, complete with downloadable PDF diagrams for easy reference and setup. Let's get started!
Safety Guidelines
- Always use proper grounding techniques to prevent electric shock and hum. Ensure your power supply is appropriately rated for your equipment.
- Adjust amplifier volume gradually to avoid sudden loud noises that can damage your hearing or equipment. Start low and increase slowly.
- Never leave your equipment unattended while powered on. Unplug all devices when not in use to prevent accidents and damage.
Methods: Stereo Delay Pedal Setup
Tools Needed
- Marshall 4x10 Cabinets
- JCM900 Amplifier Head (50W)
- Rev G20 Amplifier Head (20W)
- Stereo Delay Pedal (e.g., IK Multimedia X-Time)
- Shure SM57 Microphone
- Sennheiser e906 Microphone
- Audio Interface
Step-by-Step Instructions
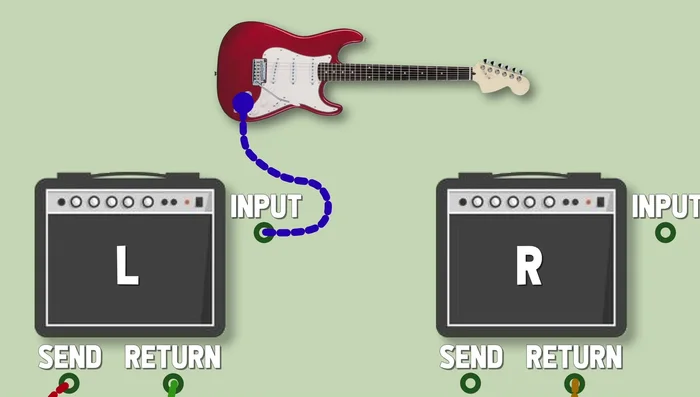
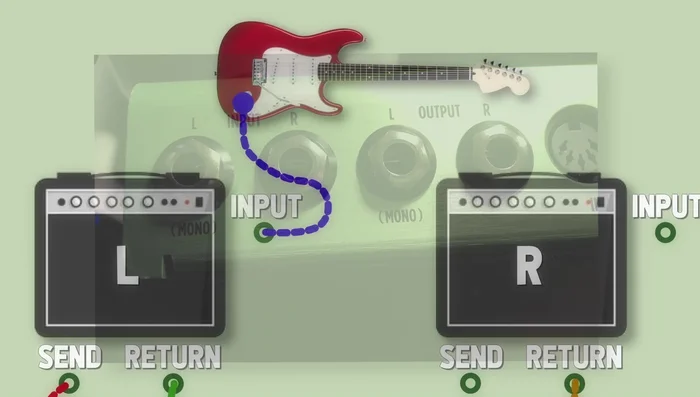
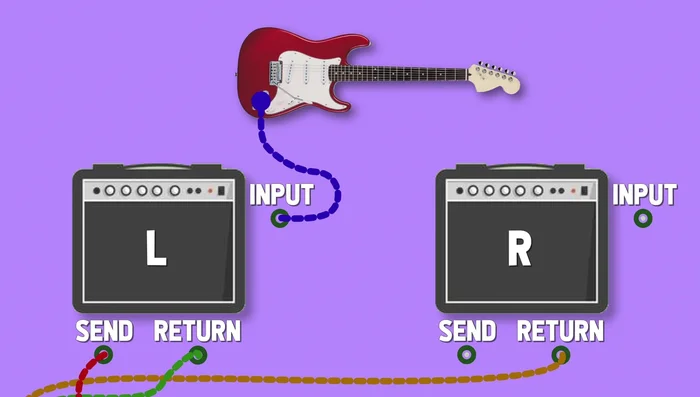
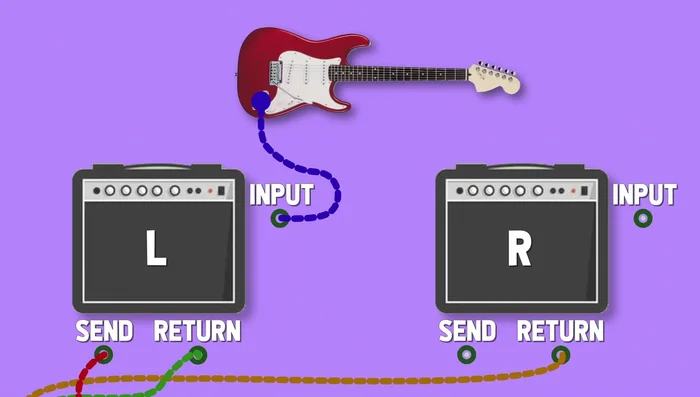
Connecting the Guitar and Main Amp
- Plug your guitar into the main amp (Marshall, left side).

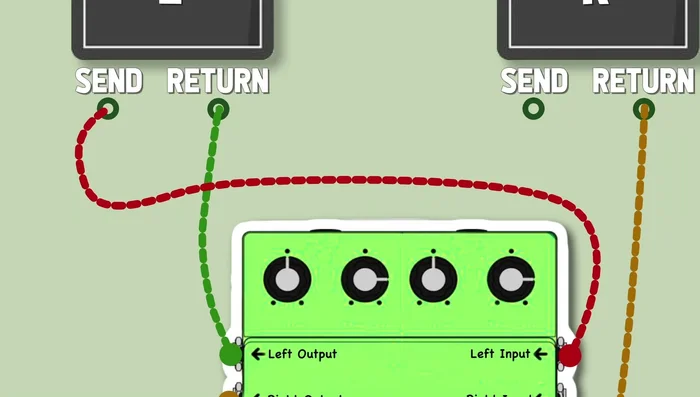
Connecting the Guitar and Main Amp Connecting the Delay Pedal to the Main Amp
- Connect the send from the left amp to the left input on the stereo delay pedal.
- Connect the return from the left amp to the left output of the delay pedal.
Connecting the Delay Pedal to the Main Amp Connecting the Delay Pedal to the Secondary Amp
- Connect the right output of the delay pedal to the return on your second amp (Rev).
Connecting the Delay Pedal to the Secondary Amp
Tips
- Use any stereo delay pedal; the Line 6 DL4 and IK Multimedia X-Time are mentioned as good options.
- The X-Time allows sharing presets between the pedal and its Amplitube plugin for flexibility between live performance and recording.
Methods: Stereo Delay & Reverb Setup
Tools Needed
- Marshall 4x10 Cabinets
- JCM900 Amplifier Head (50W)
- Rev G20 Amplifier Head (20W)
- Stereo Delay Pedal (e.g., IK Multimedia X-Time)
- Stereo Reverb Pedal (e.g., IK Multimedia X-Base)
- Shure SM57 Microphone
- Sennheiser e906 Microphone
- Audio Interface
Step-by-Step Instructions
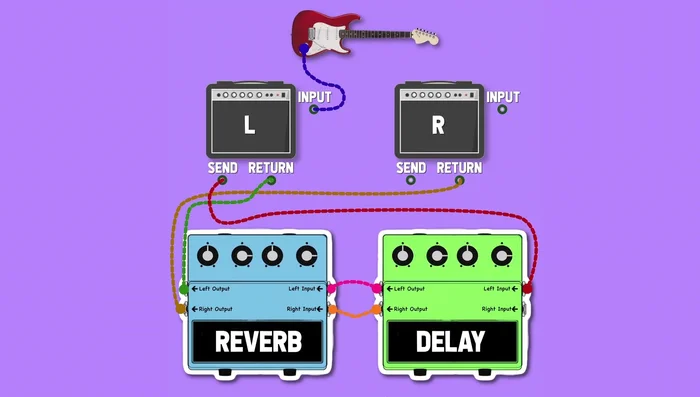
Basic Stereo Delay Setup
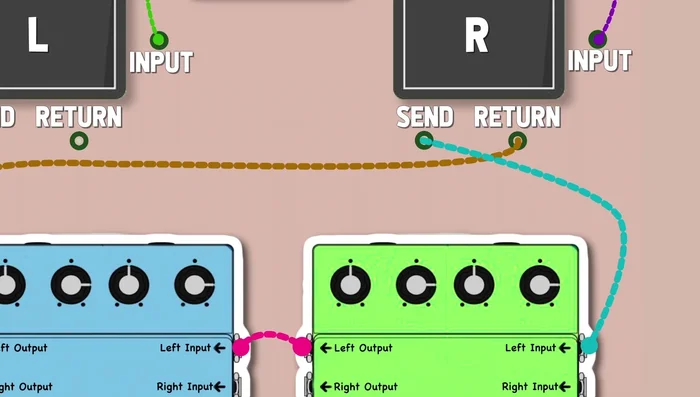
- Connect the send from your left amp to the left input on the delay pedal.
- Connect the left output of the Reverb to the return on your left amp.
- Connect the right output of the Reverb to the return on your right amp.
Basic Stereo Delay Setup Adding Reverb to Stereo Delay
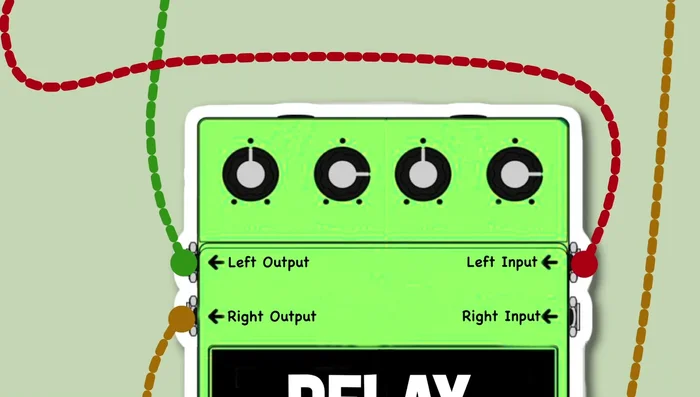
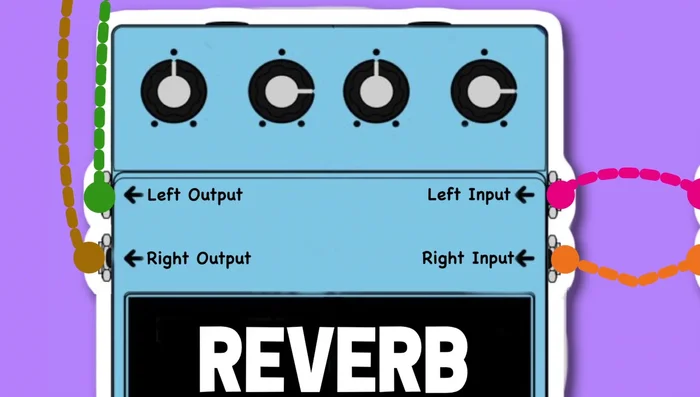
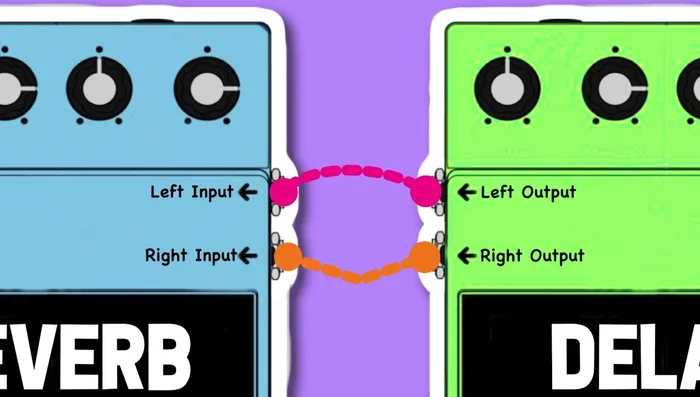
- Connect the left and right outputs from the delay pedal to the corresponding inputs on the Reverb pedal.
Adding Reverb to Stereo Delay Initial Guitar Connection
- Connect your guitar to the input of your left amp.
Initial Guitar Connection
Tips
- The X-Base reverb pedal, like the X-Time delay, offers preset sharing between the pedal and plugin.
- Experiment with delay before or after reverb in the signal chain to find what sounds best.
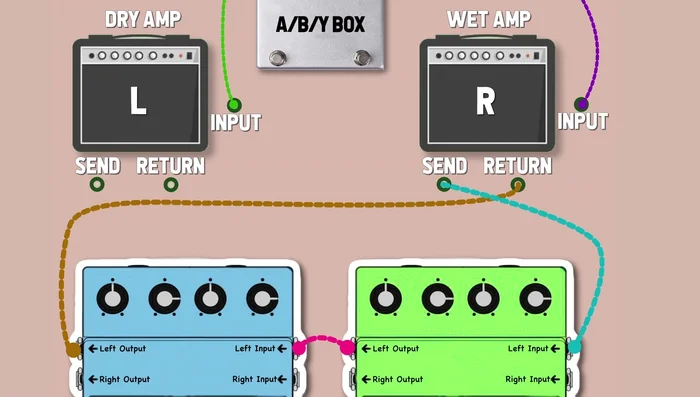
Methods: Wet/Dry Amp Setup
Tools Needed
- Marshall 4x10 Cabinets
- JCM900 Amplifier Head (50W)
- Rev G20 Amplifier Head (20W)
- ABY Box
- Stereo Delay Pedal (e.g., IK Multimedia X-Time)
- Stereo Reverb Pedal (e.g., IK Multimedia X-Base)
- Shure SM57 Microphone
- Sennheiser e906 Microphone
- Audio Interface
Step-by-Step Instructions
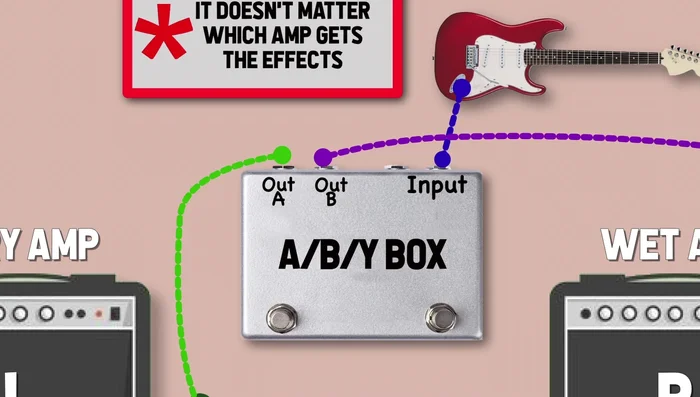
Connecting the ABY Box
- Connect your guitar to the input of the ABY box.
- Connect the two outputs of the ABY box to the inputs of both amps.
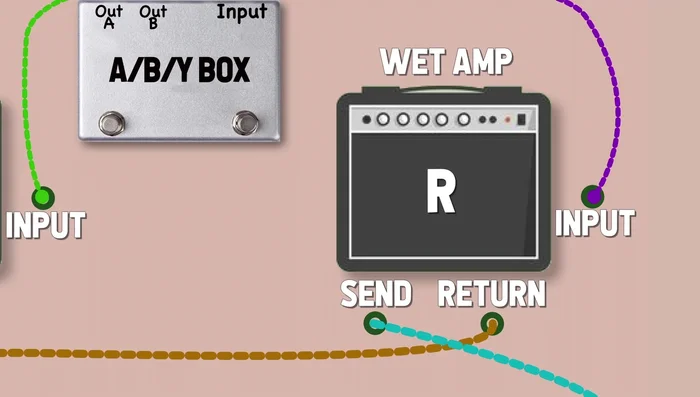
Connecting the ABY Box Connecting the Effects Chain
- Connect the send from your chosen ‘wet’ amp to the input of the delay pedal.
- Connect the delay output to the reverb input.
- Connect the reverb output back to the return of the same amp.
Connecting the Effects Chain

Tips
- An ABY box allows you to run two amps simultaneously, blending a wet (effected) signal with a dry signal for clarity and definition, especially in live settings.
- This setup is also beneficial in the studio for recording dry tracks and then applying effects later in the mixing stage.