Your guitar is more than just an instrument; it's an extension of yourself, a vessel for your creativity and passion. Protecting this valuable investment goes beyond simply storing it in a closet; it requires a case that's not only durable but also reflects your personal style. Generic guitar cases, while functional, often lack the individuality that your prized possession deserves. That's where the exciting world of DIY guitar case customization comes in! Transforming a standard case into a personalized, rugged fortress is easier than you might think, offering ultimate protection and a unique aesthetic that truly represents you.
This guide delves into the exciting possibilities of customizing your guitar case, from simple aesthetic upgrades to more substantial structural reinforcements. We'll walk you through a step-by-step process, equipping you with the knowledge and inspiration to create a custom case that's both stunning and supremely protective. Get ready to unleash your creativity and transform your guitar's transport vessel into a masterpiece.
Preparation and Safety Guidelines
- Chroma Cast Case
- Exacto Knife
- Styrofoam (Owens Corning Formula 250)
- Jigsaw
- Belt Sander (or Pringles can and sandpaper)
- Sharpie
- Faux Fur
- 3M High-Strength 90 Contact Cement
- Scissors
- Always prioritize functionality over aesthetics. Modifications that compromise the case's structural integrity (e.g., excessively weakening the shell) will leave your guitar vulnerable.
- Use only high-quality, durable materials appropriate for the intended purpose (e.g., heavy-duty fabric, strong adhesives). Cheap materials can degrade quickly and fail to offer adequate protection.
- If unsure about any step, consult a professional. Incorrect modifications can damage your guitar case beyond repair and potentially void any warranty.
Step-by-Step Instructions
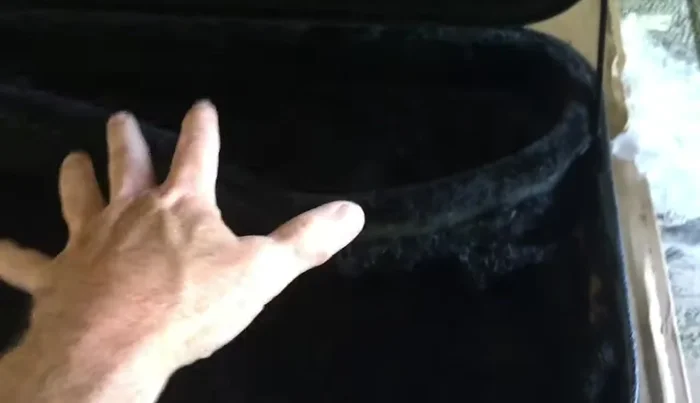
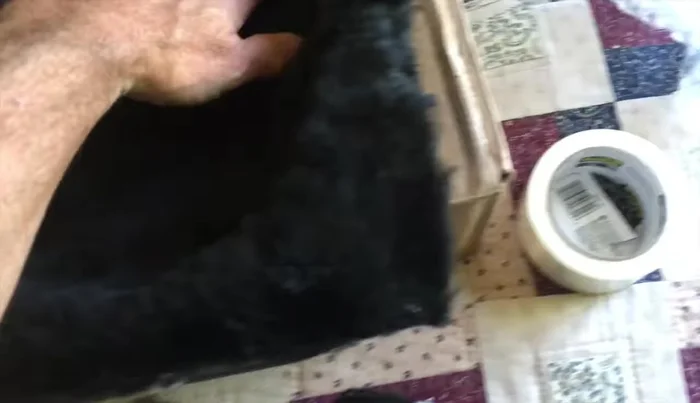
Prepare the Case
- Remove existing faux fur around the body cavity.

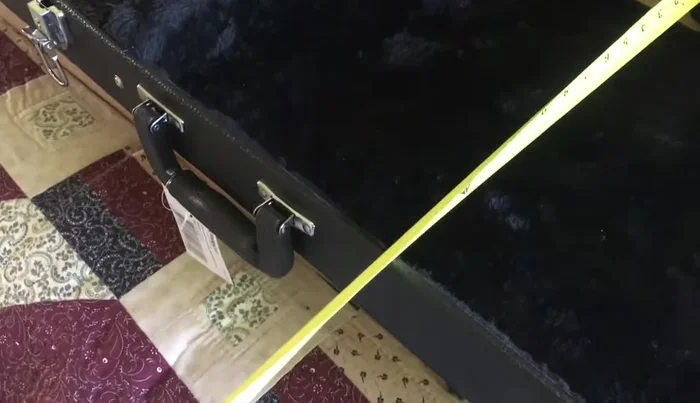
Prepare the Case Create the Styrofoam Insert
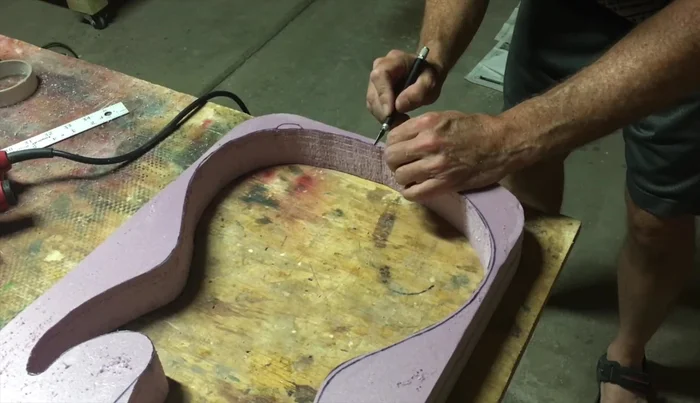
- Measure the internal dimensions of the case.
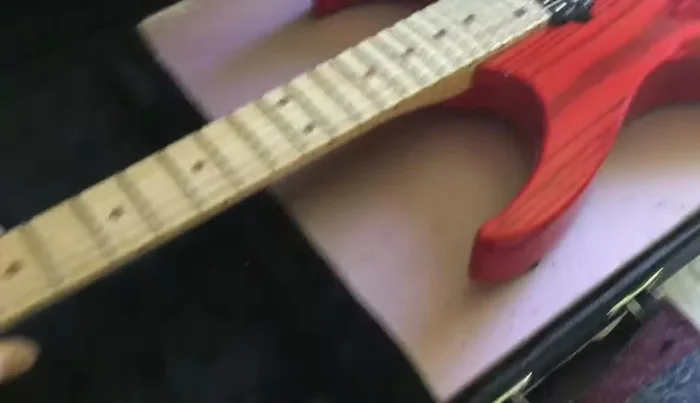
- Cut a styrofoam insert slightly undersized (1/4 inch) to fit the body cavity. Round the corners to match the case.
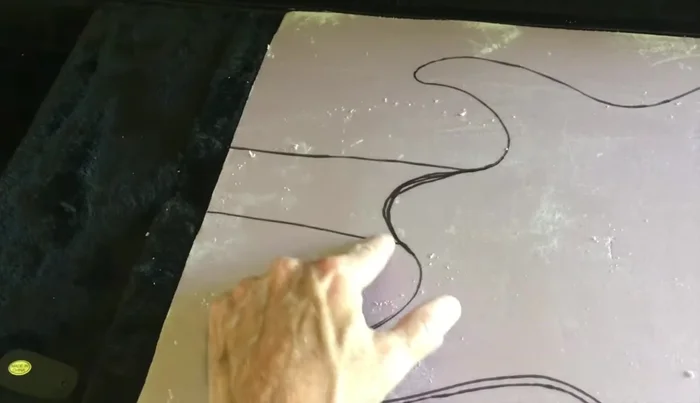
- Place the guitar in the case and trace its outline onto the styrofoam insert, adding at least 1/4 inch extra for fur coverage.
- Cut out the traced shape, using a jigsaw for the main body and a belt sander (or alternative method) to shape the neck cutout.
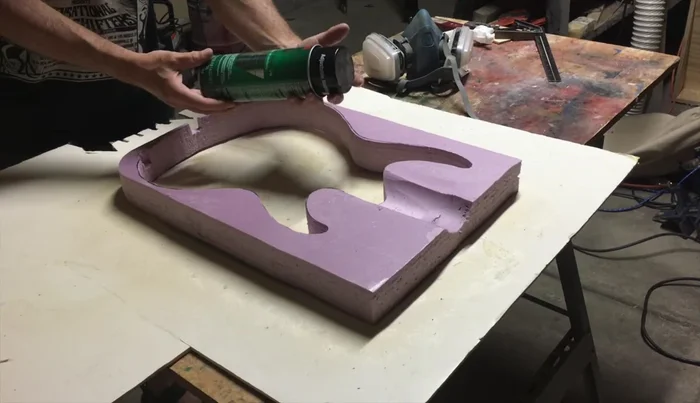
Create the Styrofoam Insert Add Extra Details to the Insert
- Cut out additional space for the strap and jack.
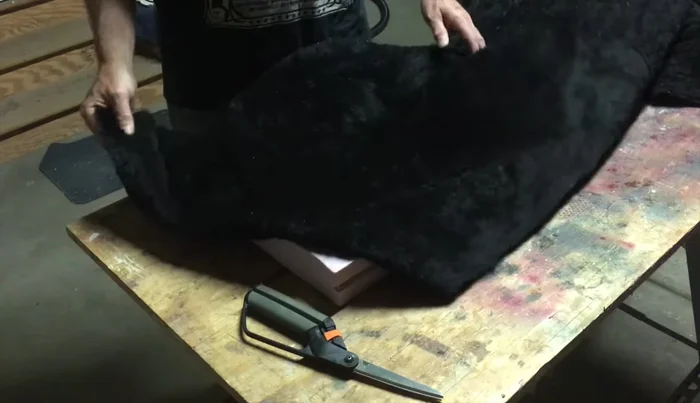
Add Extra Details to the Insert Prepare the Faux Fur
- Lay out faux fur over the insert, ensuring enough overhang to tuck and blend seamlessly with the existing fur.
Prepare the Faux Fur Apply Adhesive and Faux Fur
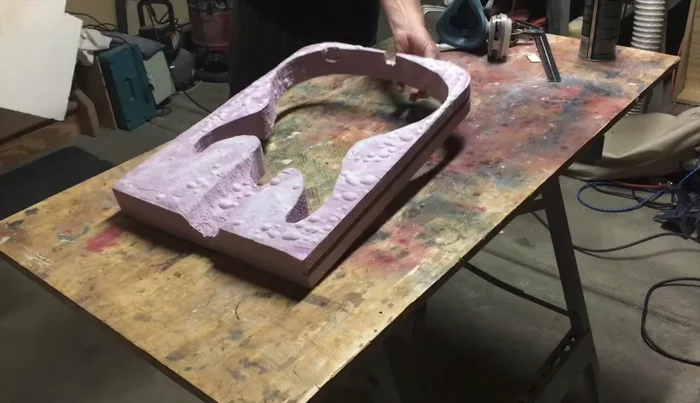
- Apply 3M 90 contact cement to the top surface and inside edges of the styrofoam insert.
- Carefully apply the faux fur, tucking it in and ensuring proper alignment.
Apply Adhesive and Faux Fur Assemble and Finish
- Insert the customized insert into the guitar case and tuck any remaining fur.
Assemble and Finish

Read more: Deep Clean Your Case: A Step-by-Step Guide
Tips
- Use an exacto knife to carefully slice around glued-on fur for easier removal.
- Leave the bottom fur intact.
- Use a jigsaw with an extra-long blade for cutting the styrofoam.
- If you don't have a belt sander, use a Pringles can and sandpaper to carve out the neck area.
- Work quickly but carefully with the contact cement, as it has a limited working time.