Guitar picks, seemingly simple objects, represent a fascinating intersection of design, material science, and manufacturing. The quest for the perfect pick – one that offers optimal grip, tone, and durability – often leads players down a path of experimentation and sometimes, frustration. For those seeking to produce their own custom picks in large quantities, mastering efficient injection molding is paramount. This process allows for precise replication, consistent quality, and significant cost savings compared to traditional methods. But navigating the intricacies of injection molding can be challenging.
This guide offers a practical, step-by-step approach to efficient injection mold making for guitar picks, demystifying the process and empowering you to create your own high-quality picks. From initial design and CAD modeling to selecting the appropriate materials and executing the molding process, we will walk you through each crucial stage, ensuring you’re equipped to produce a steady stream of perfectly formed picks ready for the stage or studio.
Preparation and Safety Guidelines
- 3D CAD software (Fusion 360)
- CNC milling machine
- Aluminum bar
- End mills (various sizes)
- Engraving bit
- Injection molding machine
- Dead blow hammer
- Always wear appropriate safety glasses and hearing protection when operating injection molding machinery. High-pressure molten plastic and loud noises are inherent risks.
- Ensure the injection molding machine is properly grounded to prevent electrical shocks. Regularly inspect wiring and connections for damage.
- Never attempt to adjust or repair the injection molding machine while it is running. Allow the machine to cool completely before any maintenance or adjustments are made.
Step-by-Step Instructions
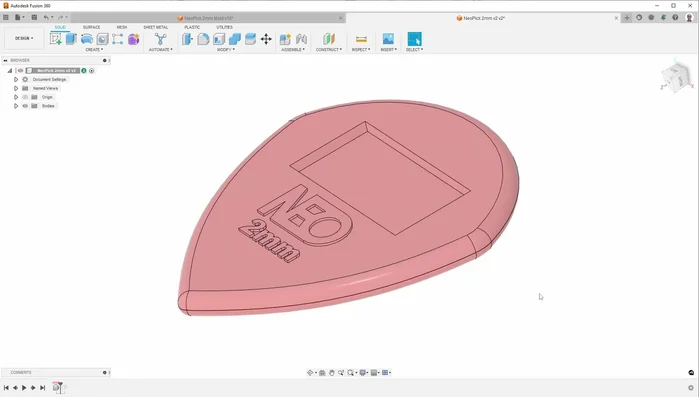
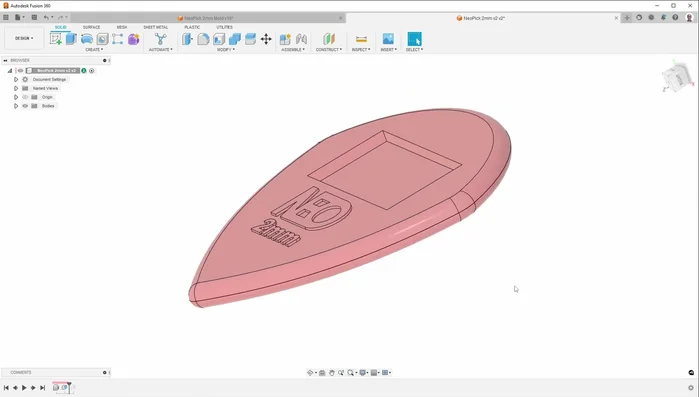
Design & Preparation
- Receive and analyze the 3D CAD file. Check for draft angles using draft analysis tools. Add draft where necessary.
- Assess clamping force requirements based on the part's cross-sectional area. Ensure your machine has sufficient clamping capacity.
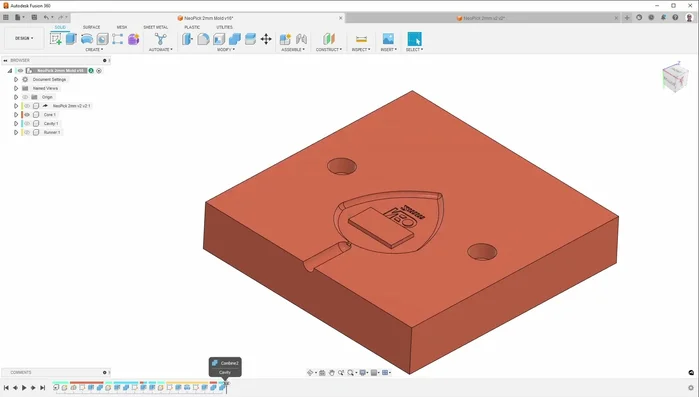
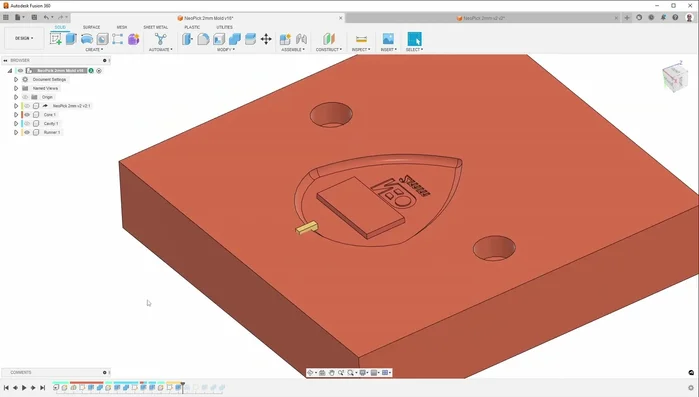
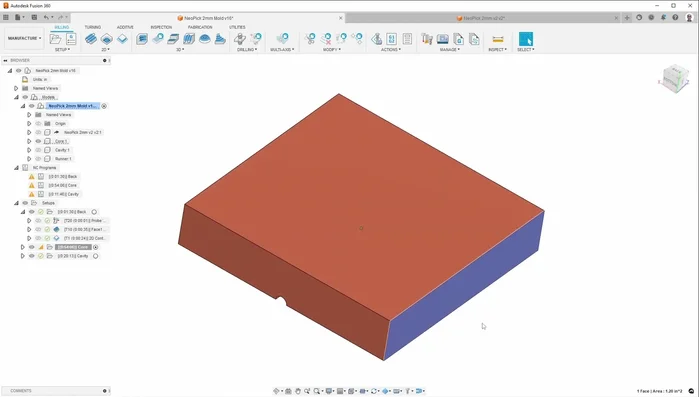
- Design the mold in CAD software. Create one half (core or cavity), then mirror and subtract the part to create the inverse mold shape for the other half.
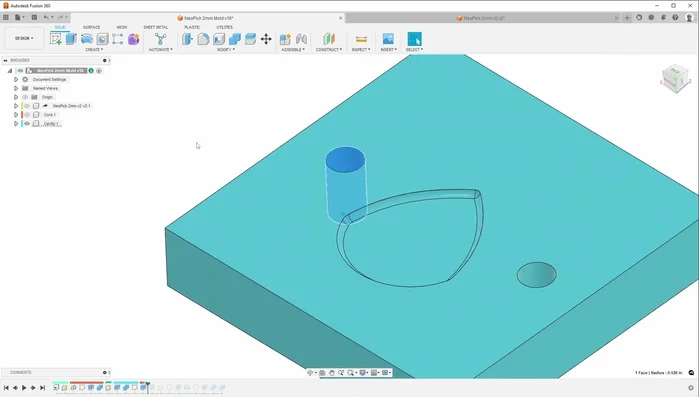
- Add alignment pins to both mold halves for accurate alignment and easy separation.

Design & Preparation - Design and position the gate strategically to minimize interference with the part's functionality and ease of cleanup. Smaller gates are generally preferred.
Design & Preparation Mold Machining
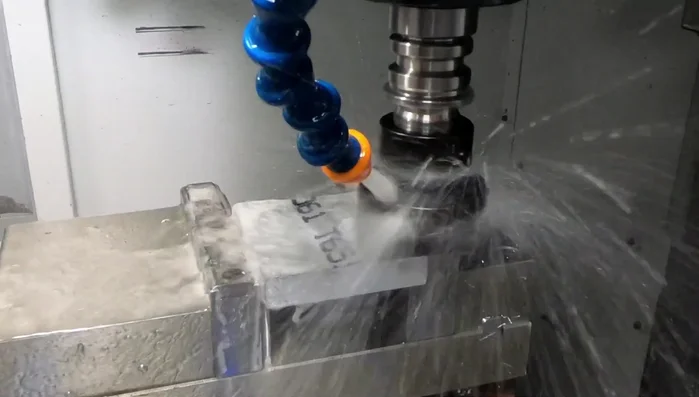
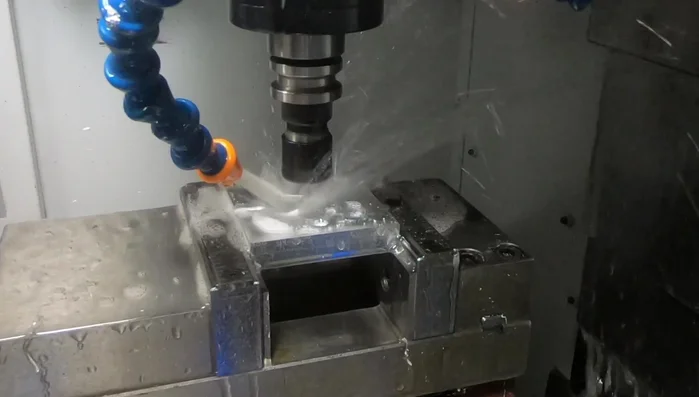
- Cut and prepare the aluminum blanks for the mold halves. Clean one side and use probing and CNC milling operations to precisely machine the mold halves according to the CAD design.
- facing, pocketing, drilling, and contouring to create the mold cavity and gate. Ensure smooth surfaces to prevent tooling marks on the final parts.
- Engrave lettering using a small-diameter engraving bit for detailed features.
Mold Machining Testing & Evaluation
- Test the mold with injection molding machine using different materials (Delrin, polypropylene, ABS) to evaluate results and material suitability.
Testing & Evaluation

Read more: DIY Guitar Picks from Old CDs: The Clear Pick Method
Tips
- Always check for draft angles early in the design process. Insufficient draft can lead to part ejection difficulties.
- Calculate clamping force needs before beginning mold making to ensure your machine is capable of handling the injection molding process.
- Use smaller gates whenever possible to minimize cleanup efforts and potential interference with the final product.
- Employ close spacing during milling to minimize tooling marks and reduce the need for post-machining polishing.