Covered guitar tuners, those elegant, sealed mechanisms adorning your Fender or other brand instrument, are vital for tuning stability and longevity. However, over time, dust, grime, and old lubricant can accumulate inside, hindering their smooth operation and potentially leading to tuning inaccuracies or even breakage. Neglecting their upkeep can result in frustrating tuning experiences and costly repairs down the line. This is especially true in environments with high humidity or dust levels.
Regular cleaning and relubrication are crucial for maintaining the precision and longevity of your tuning machines. This simple process, requiring only a few basic tools and supplies, will revitalize your tuners and ensure years of reliable performance. Let's dive into the step-by-step guide that will show you exactly how to clean and re-grease your covered guitar tuners effectively and safely.
Preparation and Safety Guidelines
- Screwdriver (small, Phillips head)
- Shop towels
- Dixie cups
- Naptha or oil-based cleaner
- Toothbrush (old)
- Toothpick
- Lithium grease
- Q-tip (optional)
- Always power down your amplifier and disconnect the guitar from any power source before starting any cleaning or maintenance.
- Use only appropriate cleaning solutions and lubricants designed for musical instruments. Avoid harsh chemicals or solvents that can damage the finish or internal components.
- Be gentle when handling the tuner gears and other delicate parts. Excessive force can cause damage or breakage.
Step-by-Step Instructions
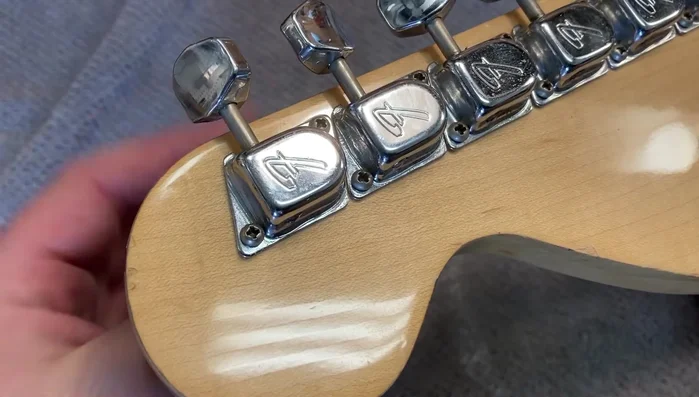
Prepare the Tuner
- Loosen the string and remove it from the tuner post.

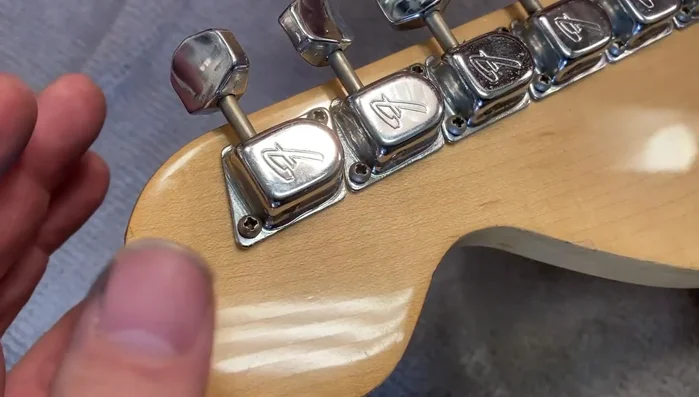
Prepare the Tuner Remove the Tuner
- Remove the tuner cover using a small screwdriver.
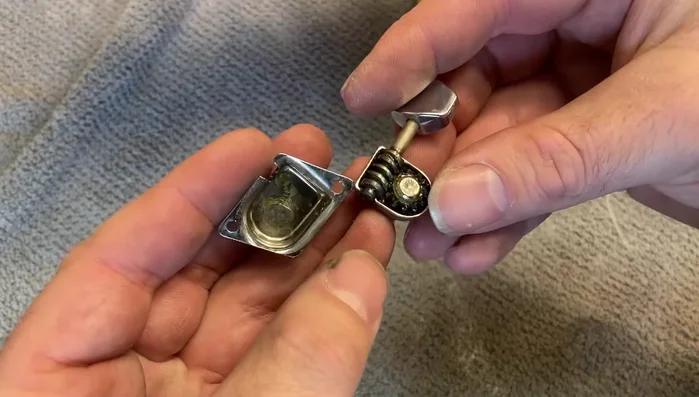
- Remove the internal tuner plate by gently applying leverage to the tuning key.
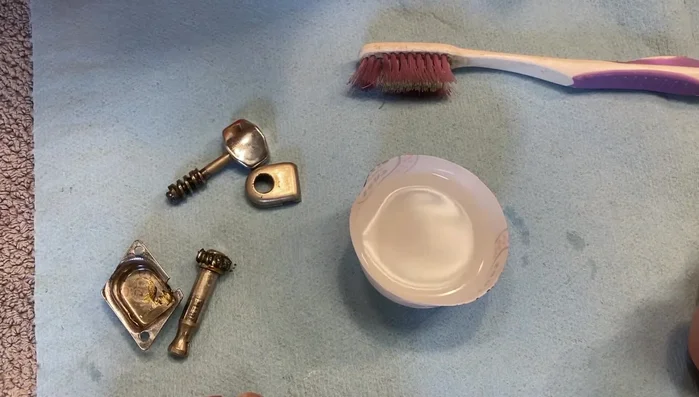
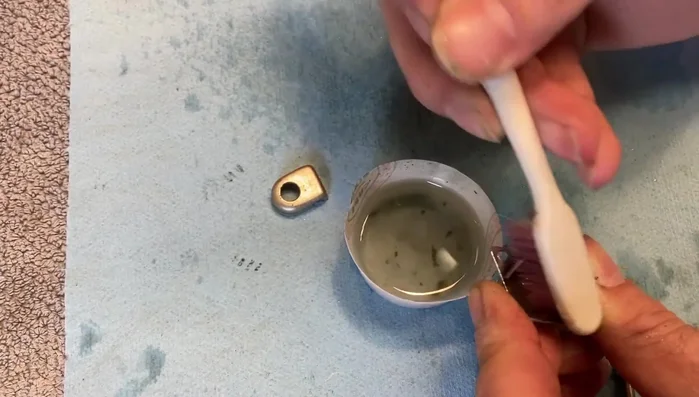
Remove the Tuner Clean the Tuner Parts
- Clean the tuner parts using an oil-based cleaner (naptha) and a toothbrush. Remove any metal shavings or hardened grease with the toothbrush and toothpick. Pay close attention to the worm gear and spur gear.
- Clean the tuner cover with a toothbrush or Q-tip to remove any dried residue.
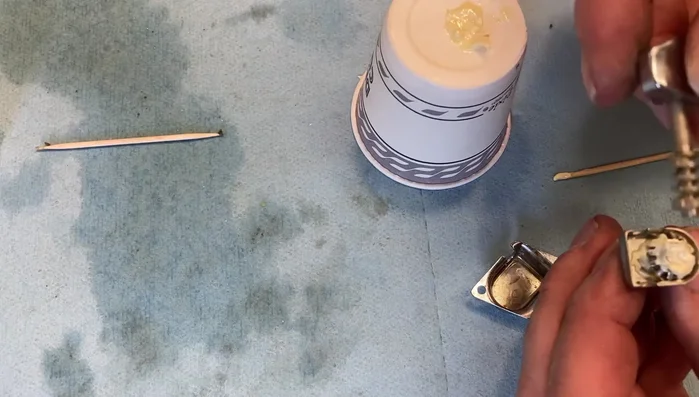
Clean the Tuner Parts Grease the Tuner
- Apply a small amount of lithium grease to the worm gear and spur gear using a toothpick.
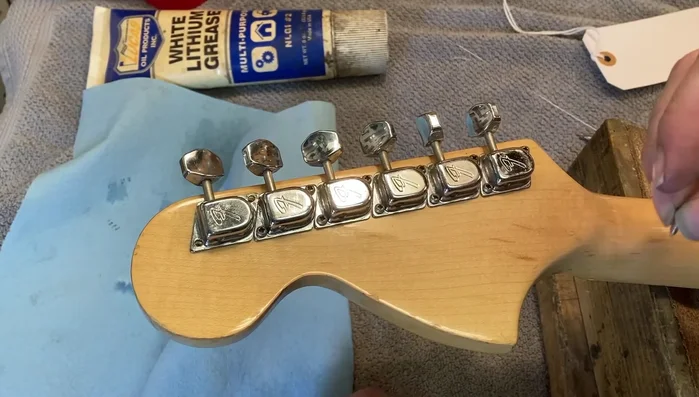
Reassemble the Tuner
- Reassemble the tuner, ensuring the correct orientation for the guitar headstock.
- Wipe off excess grease from the tuner post with a naphtha-soaked rag. Be careful not to get grease on the guitar's finish.
- Reinstall the tuner and tighten the screws gently.
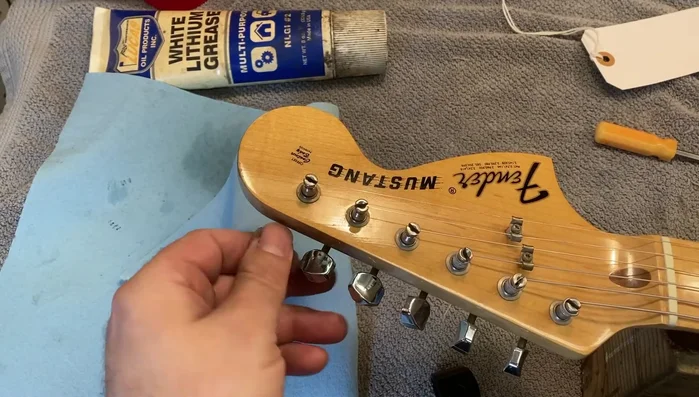
Reassemble the Tuner Finalize
- Reinstall the string and tune the guitar.
Finalize
Read more: Fixing Loose Acoustic Guitar Tuners: The Toothpick & Glue Method
Tips
- Use oil-based cleaning agents for oil-based components like grease.
- Use a parts tray to keep track of small screws.
- Do not use WD-40 or other penetrating oils for lubrication; they can damage the finish.
- It's okay to use a generous amount of grease on covered tuners, as it won't be exposed to the environment.
- Clean your fingers and the tuner post after applying grease to avoid transferring grease to the guitar's finish.