Nylon guitar strings, while offering a warm, mellow tone, require regular changing to maintain optimal playing experience and sound quality. Whether you're a seasoned guitarist noticing a loss of clarity or a beginner tackling their first string change, the process can seem daunting at first. However, with the right approach and a little patience, replacing your nylon strings is a straightforward task that significantly enhances your instrument's performance. Broken strings, buzzing notes, and a generally dull sound are all telltale signs it's time for a refresh.
This simple, step-by-step guide will walk you through the entire process of changing your nylon guitar strings, from removing the old strings safely to tuning your guitar to pitch. We'll cover essential tools, techniques to avoid damaging your instrument, and tips for achieving a perfect, resonant sound. Let's get started!
Preparation and Safety Guidelines
- New set of nylon strings
- Electric or manual string winder
- String cutters
- Always tune your guitar down to the lowest possible setting before changing strings to reduce tension and prevent neck damage.
- Use proper string-cutting tools like wire cutters to avoid accidental cuts. Never use your teeth!
- Dispose of old strings responsibly. Broken strings are sharp and potentially dangerous.
Step-by-Step Instructions
Prepare for String Change
- Find a flat surface and lay your guitar down.
Remove Old String
- Loosen one string at a time using a string winder. Completely unwind the string.
- Remove the old string.

Remove Old String Install New String: Bridge Section
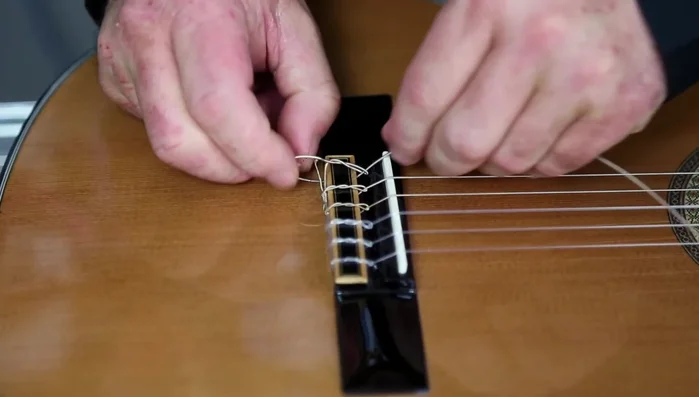
- Use the uncut, non-floppy end of the new string. Feed it through the bridge 5-8 centimeters.
- Make two knots in the string at the bridge.
Install New String: Bridge Section Install New String: Tuning Peg Section
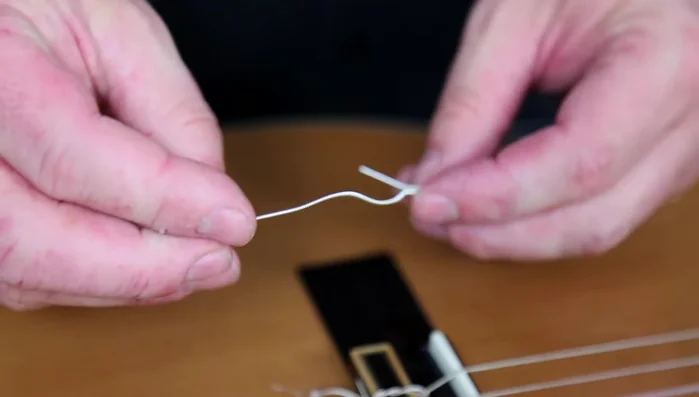
- Pull the string through the tuning peg, leaving 5-8 cm past the peg. Trim the excess.
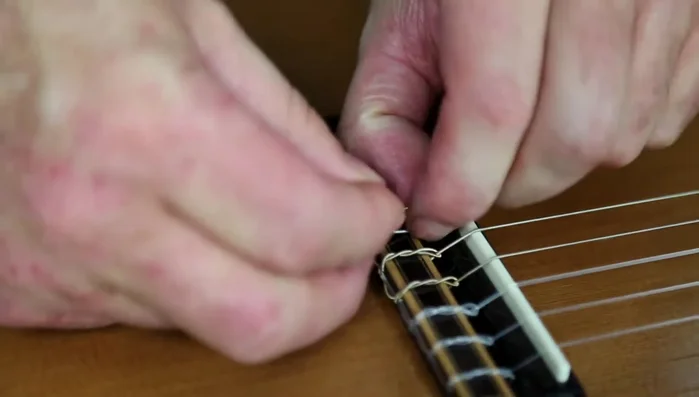
- Feed the string through the tuning peg 3-4 centimeters.
- Wind the string onto the tuning peg half a turn.
- Wrap the excess string around the top of the wound string and feed it back down through the hole.
Install New String: Tuning Peg Section - Tighten the string using a string winder (electric or manual).
Install New String: Tuning Peg Section Tune and Stretch New String
- Stretch the string 8-10 centimeters several times to ensure it's tight and in tune. Repeat this process until the pitch no longer drops after stretching.
Tune and Stretch New String Repeat for Remaining Strings
- Repeat steps 4-11 for each string.
Repeat for Remaining Strings Final Trim
- Trim the excess string at the end.


Read more: Fast & Easy Guitar Stringing: The Winder Method
Tips
- Loosen one string at a time to maintain guitar tension.
- Use the non-floppy end of the new string.
- String stretching is crucial to prevent tuning issues.